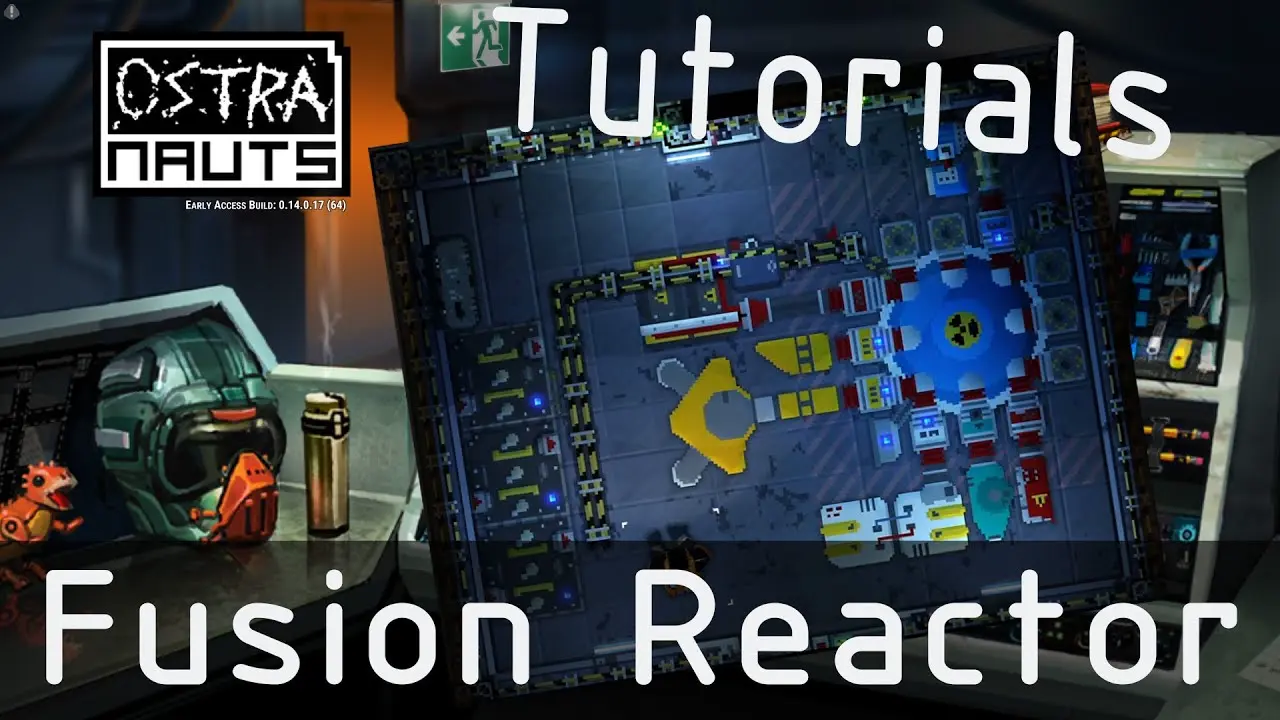
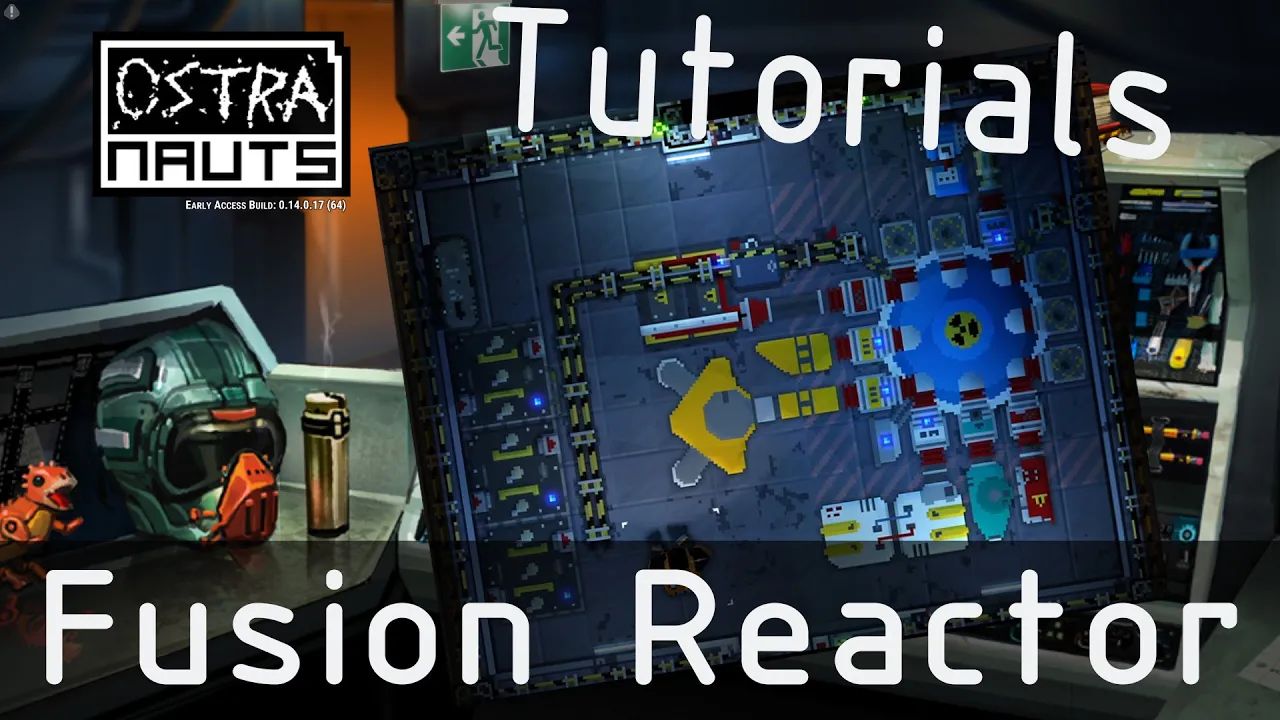
The Ostranauts fusion reactor — the Sulaiman Inertial Confinement Fusion Reactor (ICFR) — is the endgame power plant for serious hulls. It eats D2O and He3, dumps heat into your ship if you ignore cryo cooling, and outputs enough kWh (via the MHD generator) to run scrubbers, doors, nav, and eventually torch burns. This guide covers parts, wiring, breaker panels, battery buffers, core temperature, and how fusion fits next to RCS cold-gas thrusters. Vanilla has no solar panels — batteries + ICFR/MHD are your generation stack. Verified August 16, 2026 · Steam · Official wiki — Fusion.
D2O (deuterium oxide) + He3 canisters — He3 burns faster (~1:3 to 1:13 tank ratio)
Footprint
~13×7 tiles — 5×5 field coil base, core over center gap
Power ports
Input (inward red arrow) from batteries; output (outward arrow) to grid
Key output
MHD generator converts plasma to ship kWh (skip MHD = thrust only, no charge)
Cooling
Cryo Reservoir + Cryo Distribution Pump — essential for closed-cycle power
Buffer
Battery banks between reactor output and breaker panels
Heat
Core temp rises under load — Ablative Core Liner takes damage if overheated
What is the Inertial Confinement Fusion Reactor?
Unlike the campy sci-fi "flip one switch" reactor, Ostranauts's ICFR is a multi-part assembly simulating laser-driven inertial confinement fusion. Fuel pellets get compressed by synchronized lasers; plasma exhaust spins an MHD generator that feeds your ship grid. It can also integrate with a fusion torch main drive for interplanetary burns — but most early-career players build it for station keeping and life support first.
Core vs peripherals
The Reactor Core is four quarters installed over a Field Coils Assembly (two stacked parts). Twelve feed ports around the core accept peripherals — pellet feeders, laser arrays, capacitors, fuel regulators, pumps — with flexible placement. The control terminal on the core is where you run purge, fuel, and bus modes.
Why batteries sit on the input side
The core needs external power before it can fuse anything. Connect a ship battery to the input port (inward-facing red arrow on the wiki install diagram). Once running, the output port feeds the MHD generator's production back into the grid — often through more batteries acting as buffers.
Which Sulaiman fusion parts do I need?
Salvage runs and cargo kiosks both list Sulaiman fusion parts — sometimes whole, often as boxed assemblies. Before hauling pieces through EVA, know the required set vs optional quality-of-life.
Part
Required?
Role
Field Coils Assembly (2× halves)
Yes
Foundation — center of fusion torch geometry
Reactor Core Assembly (4× quarters)
Yes
Containment, control terminal, power ports
Pellet Feeder
Yes
Injects mm-scale fuel pellets into core
Fuel Regulator
Yes
Combines/cools D2O + He3 into pellets
Laser Capacitor
Yes
Stores burst energy for ignition
Laser Array (match feeder count)
Yes
Aligns and fires lasers at pellet
D2O Canister (deuterium)
Yes
Heavy-water fuel supply
He3 Canister
Yes
Helium-3 fuel supply — burns faster than D2O
MHD Generator
Effectively yes
Turns plasma flow into usable ship power
Fusion Core Pump
Optional
Evacuates core to vacuum faster than waiting on hull leaks
Ship battery (1×1 minimum)
Yes for startup
Powers purge, caps, and control before self-sustaining
Salvage vs buy
Boneyard derelicts often carry partial Sulaiman kits — a regulator without a feeder, or a cracked laser array. The salvage guide priority list ranks fusion parts near the top for resale value. Buying Fusion Parts cargo at stations fills gaps when RNG refuses to spawn a capacitor.
Install order on feed ports
Peripheral placement is flexible — the wiki explicitly says parts need not touch each other — but practical builds cluster fuel regulator → pellet feeder → laser capacitor → laser array on adjacent ports so conduit and maintenance paths stay short. MHD generator placement matters most: prioritize the port closest to your output arrow and battery bank.
Power draw while idle vs firing
Idle draw keeps CRYO, control systems, and magnetic pumps alive; ignition spikes laser cap recharge and pellet injection. Size battery banks for the spike, not the idle tick. If your PwrViz overlay shows scrubbers dipping when LAS CAP charges, add storage or stagger startup until life support is on a protected breaker.
How does power draw (kWh) work on the ship grid?
Every powered device in Ostranauts lists Power Draw in kWh (kilowatt-hours per game tick context — treat it as relative load, not a real-world bill). Reactors produce kWh; batteries store it; breakers route it; consumers — scrubbers, pumps, doors, nav, transponders — drain it.
Layer
Function
Generation
ICFR MHD output · charged batteries (discharge)
Storage
Ship batteries / battery banks — buffer spikes and startup
Distribution
Conduit runs in walls/ceilings — keep paths redundant
Control
Breaker panels, signal boxes — isolate rooms or devices
Consumers
Life support, avionics, RCS regulators (electric solenoids), heaters
Read draw before you expand
Use the PDA PwrViz cartridge or the reactor control UI output meters. Community reactor videos commonly cite ~100+ kW charge rates on healthy setups — but your hull's total draw must stay below sustained output or batteries bleed dry. Add a bank before you add a second scrubber deck.
Brownout symptoms
Doors stuck open or closed, scrubbers silent, nav rebooting, transponder refusing ON — all classic low-bus symptoms. Life support failure kills crew faster than debt collectors; see life support guide for priority loads.
Where do breaker panels and battery banks go?
Circuit breaker panels and signal boxes are the control layer on top of raw conduit. Breakers protect branches; signal boxes let you toggle groups without spacewalking to every device.
Battery bank placement
Put storage between reactor output and the rest of the ship — a dedicated "e-room" adjacent to the core minimizes conduit length and heat bleed into crew quarters. Many optimal layouts use two banks: one on reactor input for startup isolation, one on output for load buffering.
Breaker panel zoning
Split branches logically:
Do01Life support branch — scrubbers, O2 pumps, heaters (never share breaker with optional luxuries)
Do02Avionics branch — nav console, transponder, antenna
Do04Propulsion branch — RCS intake regulators (electric control, not the gas itself)
Signal boxes for soft switching
Signal boxes connect to device outputs and behave like software breakers — main breaker off kills all connected loads; individual toggles re-enable one device. Chain boxes with AND/OR logic if you want "reactor on AND life support armed" interlocks. KosGames' signal box primer matches in-game behavior: infinite outputs, eject severing, logic gates for multi-input setups.
What is an optimal fusion reactor layout?
Search volume for optimal fusion reactor layout ostranauts (~1,100) wants a blueprint, not theory. There is no single meta — hull shape differs — but the community converges on a few rules that beat ad-hoc spaghetti wiring.
Rule
Why
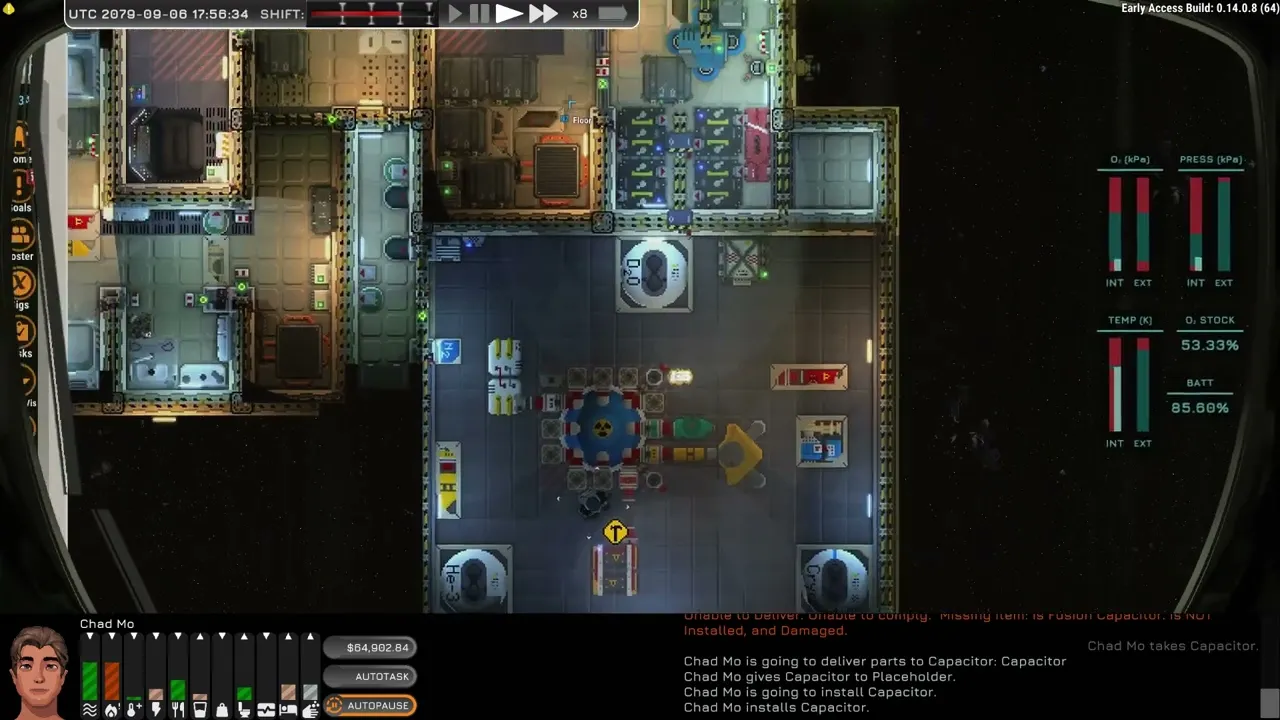
Dedicated reactor room (~13×7)
Fuel tanks and lasers need feed-port access without blocking corridors
Core control panel faces a walkway
You purge and toggle bus modes constantly early on
MHD generator on nearest feed port to output arrow
Shortest high-load conduit run
Fuel tanks in the same room, anchored
D2O/He3 leaks are less catastrophic behind one pressure door
Redundant conduit bridges over doors
One cut segment should not kill the entire grid
Vents or exterior hull exposure nearby
Core heat needs somewhere to go — see life support
Sample footprint (text blueprint)
Imagine a rectangular e-room: south wall lined with D2O and He3 tanks; east and west feed ports carry paired laser arrays and capacitors; north side hosts MHD generator output wired into a battery bank; corridor door bridged with double conduit paths overhead (as shown in recent 1.0 let's-play reactor episodes). Field coils sit dead center with a one-tile maintenance gap for EVA repairs.
Torch drive coupling
When the ICFR doubles as a fusion torch main engine, the same core room feeds interplanetary burns. That integration is why the 13×7 footprint matters — you are building a propulsion bay, not a closet generator. Keep main-engine fuel plumbing visually separate from life-support breakers so a burn checklist does not accidentally kill scrubbers mid-transit.
Next: keep life support online
Matched by build plan, shared topics, and guide progression — not random related links.
Reactor core temp climbs when lasers fire, plasma confinement wobbles, or exhaust cannot leave. Heat is not a separate mini-game from life support — it is the same atmospheric energy your heaters, coolers, and vents must handle.
Startup heat spike
The purge-and-ignite sequence (next section) deliberately stresses the core. Run CRYO cooling on laser assemblies, keep CORE PURGE off once vacuum is achieved so you do not suck fuel back out, and watch pressure indicators until they read VAC. Skipping vacuum leads to failed ignitions and wasted D2O.
Sustained operation
He3 burns faster than D2O — the Fusion wiki recommends roughly 1 D2O tank to 3–13 He3 tanks for extended torch travel. Before ignition, verify fuel readouts meet minimums (He3 > ~6.6 kg, D2O > ~4.45 kg). If core temp keeps rising while output flatlines, check MHD connection, laser alignment (LAS ALIGN), Cryo ON, and Ablative Core Liner condition.
Heat vs habitable decks
Do not put crew bunks directly above the core unless you enjoy CO2 headaches. Route habitation one pressure door away, with scrubbers on a protected breaker branch so reactor experiments cannot suffocate the ship.
How does fusion power relate to RCS vs main engines?
Fusion feeds electricity. RCS uses cold compressed gas (often N2) through intake regulators and thruster pods — separate tanks, separate plumbing, but the regulators and nav console still need kWh from your reactor or batteries.
System
Energy type
Typical use
RCS thrusters
Cold gas + electric solenoids
Docking, station keeping, fine attitude
Fusion torch / main drive
D2O + He3 plasma exhaust
Interplanetary burns, heavy delta-V
Ship battery
Stored kWh
Startup, emergency, peak buffering
MHD generator
Plasma → ship kWh
Required for charging batteries; optional for thrust-only
Why RCS brownouts still happen on fusion ships
Players expect unlimited power once the ICFR hums — then RCS refuses to fire during a dock because the avionics breaker tripped or the battery input was switched to charge mode incorrectly. Keep RCS regulators on a branch that stays powered during reactor bus changes.
Main engines vs reactor fuel
Torch drives consume the same D2O/He3 family as the reactor. Long burns drain tanks you sized only for electrical generation. Cargo runs for Fusion Parts, He3, and D2O become routine — budget mass on the hull accordingly.
What is the reactor startup sequence?
Follow the official Fusion wiki checklist until muscle memory kicks in. Order matters — bad bus/purge order wastes fuel and fails ignition.
Do01Wire a charged ship battery to the reactor input port
Do02Set PWR BUS to BATT and wait for lamp test (all lamps indicate)
Do03Verify BATT % POWER green, capacitor charging/READY, He3 > ~6.6 kg, D2O > ~4.45 kg
Do04If CORE PRESSURE is not VAC: set CORE PURGE to RGH until VAC, then OFF (or OPEN cycle in vacuum if no core pump)
Do05Set LAS ALIGN ON — wait for READY green
Do06Set PEL FEED ON — wait for READY green
Do07Set CRYO ON (inoperable if no Cryo Pump — do not skip cryo for closed-cycle power)
Do08Verify THRUST ACTIVE safety OFF, FLOW at MINIMUM, CYCLE CLOSED
Do09Press FUEL REG → FWD → REAR on Field Coils (lamps solid)
Do10Set RATIO to MHD, set MHD ON, then IGNITION ON
Do11For battery charge: MHD ON + PWR BUS to CHRG — verify batteries charging
Optional vs essential
Core Pump is optional in vacuum (speeds purge). MHD is optional for thrust-only but required to charge ship batteries. Cryo Pump + Reservoir are essential for closed-cycle power — running without cryo overheats, burns the Ablative Core Liner, and can explode the reactor.
Power grid mistakes that brown out life support
Scan before you undock from a fresh reactor install.
Mistake
Fix
No battery on reactor input
Minimum 1×1 ship battery on input port before purge
Purge left on after VAC
Turn CORE PURGE off or you vent fuel
Single conduit through one door
Bridge redundant paths over doorways
Life support shares breaker with workshop
Separate breaker branches — scrubbers last to drop
The Sulaiman ICFR (inertial-confinement fusion reactor) is the ship’s main power and torch-drive plant. You assemble field coils, core quarters, pellet feeder, lasers, and D2O/He3 tanks in a dedicated e-room — not a single placeable “reactor block.”
What is the optimal fusion reactor layout in Ostranauts?
Use a ~13×7 dedicated e-room: 5×5 field coils with center tile removed, core quarters aligned to control panel walkway, fuel tanks along one wall, MHD on output port nearest battery bank, redundant conduit over doors.
Which Sulaiman parts are required?
Minimum: 2× Field Coils, 4× Reactor Core quarters, pellet feeder, fuel regulator, laser capacitor, matching laser array, D2O + He3 tanks, and a charged ship battery. Add MHD for power generation and Cryo Pump + Reservoir for safe closed-cycle operation.
How do breaker panels help?
They split the grid into isolated branches so one fault does not kill scrubbers, and they pair with signal boxes for grouped toggles.
Why does my reactor core temp keep rising?
Check vacuum state, CRYO ON, Ablative Core Liner condition, MHD wiring, and whether you are running closed-cycle without cryo cooling.
Does fusion power my RCS thrusters directly?
No — RCS uses cold gas tanks. Fusion powers the electric regulators and nav that control them.
Does vanilla Ostranauts have solar panels?
No — generation is ship batteries plus ICFR/MHD. Some Workshop mods add solar; this guide covers the unmodded game.
Where do I get fusion parts early?
Salvage derelicts in the boneyard and buy Fusion Parts cargo at station kiosks — see the salvage guide.